Wednesday, 30 November 2011

How to find Keylogger on your PC ?


What is Keylogger?
Keylogger is application which is used for tracing the keystrokes of the keyboard. With this application one can easily trace the activities in your the computer. This program is mainly used for monitoring the activities in the computer .


How to find Keylogger on your PC?
Start-> Run->type msconfig.
Go to Startup tab in the System Configuration window. You will see numerous programs which can be enable or disabled.
Disable all the programs , after that Turnoff the firewall and shut down the antivirus program.
Then again go to the msconfig window, if you see any program that are enable automatically then it is the keylogger application.
Remember the name of the program and location and remove it.
If you didn't find any program enabled in the msconfig window then you are free from Keylogger.
Finally turn on the firewall , antivirus and all the program that were disabled in the msconfig window.
Close all the program and restart the computer.


DONT FORGET TO COMMENT AND AND  +1 THIS ON GOOGLE 

Tuesday, 29 November 2011

Send Unlimited Free Local And International Messages


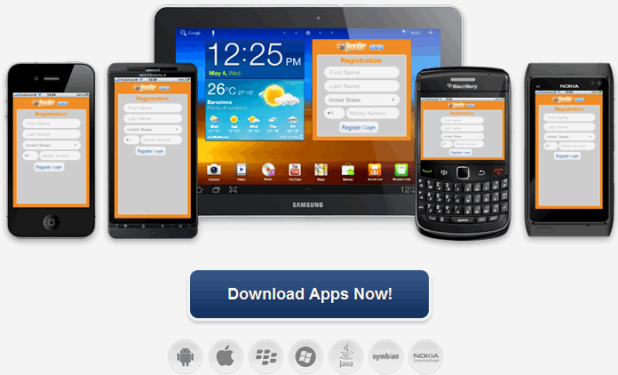
JaxtrSMS  is a small useful application which gives you freedom for free unlimited local and international messages, which you can send right from your phone after installing there application from their website. You simply need internet connection and there app and you can send free local and international messages.
Send Unlimited Free Local and International Messages

You might be thinking that you can get many apps like these which gives you free SMS sending feature but this is something different your recipient to whom you are sending SMS does not need to have any app from JaxtrSMS installed to receive SMS on their phone. So now simply visit their website and download apps according to your device like they have app for Android, iPhone, Blackberry, Windows Phone, Java Based Phone, Symbian Devices and Rest of the Sets from Nokia.

TO DOWNLOAD CLICK HERE

DONT FORGET TO COMMENT AND AND  +1 THIS ON GOOGLE 


Create a Wi-Fi Hotspot in Windows XP and vista


How to Create a Wi-Fi Hotspot in Windows XP .:

1. Go to Control Panel and click on Network Connections.

2. Right click on the wireless connection and select properties.

3. Under the wireless networks tab check the box ‘Use Windows to configure my wireless network settings’.

4. Under Preferred networks click ‘Add’.

5. In the Network Name (SSID) box enter the name of your Wi-Fi network that you want to create.

6. Under Network Sharing, select the shared option. If you want your Wi-Fi connection to be encrypted then select WEP under data encryption.

7. Enter the password for your Wi-Fi network in the network key box and the confirm network key box. Click ‘ok’.

8.  Now you should the created Wi-Fi network in the box called preferred networks.

9. Click on Advanced. Under Networks to Access, tick the option ‘Computer to Computer (ad hoc) networks only’ and click on Close.

10. Click ‘ok’ to close the window and apply all settings.

11. Finally you need to change a setting in your wires internet connection.

For this .:

1. Go to Network connections.

2. Right click on Local Network Connection and select properties.

3. Click on the Advanced tab.

4. Under Internet Connection Sharing, tick the box ‘Allow other network users to connect through this computers’ internet connection’. Make sure that the box underneath it is not selected. If you check the second option then someone else who can login can change the settings.

5. Click ‘ok’ to apply settings and close the box.

Now, you should be able to find the Wi-Fi network on any other computer that can connect to Wi-Fi.

How to setup Hotspot on Windows Vista .:

This article will help you convert your Vista based laptop in a Wireless Hotspot. Once you setup your laptop as Hotspot  you do not need a router, switch, hub, etc… to form a network, in fact other laptops or PC’s can connect or access the internet through this newly created Hotspot.

Go to Control Panel
Click on “Network and Sharing Centre”
Under Tasks choose “Setup New Connection”
Wireless “Ad-hoc network”
Now type in a “Network Name”
Choose “WEP” password if you don’t want to share the connection with the entire world
Click “Internet connection sharing”
Now a Wi-Fi enabled machine will be able to connect to the network you have just setup with the WEP password.


DONT FORGET TO COMMENT AND AND  +1 THIS ON GOOGLE 

Cool Facebook Smileys Codes

We all use Facebook and chat with all friends through text and smileys, well smileys are the best way to show the mood of a person, you can text a happy face or angry one but code to display that particular smiley is really important so below is the image demonstrating all the codes you can use in your Facebook Chat or Anywhere else.
Cool Facebook Smiley Codes for Ultimate Fun :)

SO ENJOY SHARING SMILEYS WITH YOUR FRIENDS ENJOY :-)

DONT FORGET TO COMMENT AND AND  +1 THIS ON GOOGLE 

Monday, 28 November 2011

How to Write-Protect USB Flash Drive


     Many a time, it becomes necessary for us to write protect our USB flash drive so as to protect it from viruses and other malware programs. Because flash drives are so popular and most widely used to move data between computers, they are the prime target for attackers as a means to get infections spread around the computer world. Also, since USB drive is not a Read-Only Memory (ROM), the data inside it can easily be modified or deleted by malware programs.
But unfortunately, most of the new flash drives do not come with a write-protect feature as the manufacturers wish to cut down the cost of production. Hence, the only way to write-protect your USB flash drives is to enable this feature on your own computer.
        This can be done by adding a small entry to the Windows registry which acts as a switch that can be enabled to make use of the write protection or disabled to allow write access. Just follow these steps:
    1. Open the Registry Editor (Open the “Run” dialog box, type regedit and hit “Enter”).
    2.Navigate to the following Registry key:
HKEY_LOCAL_MACHINE\SYSTEM\CurrentControlSet\Control\
    3. Create a New Key named as StorageDevicePolicies. To do this right-click on Control, and click on New->Key and name it as StorageDevicePolicies.
    4. Now right-click on  StorageDevicePolicies and create a New->DWORD (32-bit) Value and name it as WriteProtect.
    5. Double-click on WriteProtect and set the Value data to 1.
       Now the right-protection for USB drives is enabled on your computer (no restart required) and thus it would not be possible for anyone or any program to add/delete the contents from your USB flash drive. Any attempt to copy or download the files onto the USB drive will result in the following error message being displayed.
       To revert and remove the write-protection, all you need to do is just change the Value data for WriteProtect (Step-5) from 1 back to 0. Now write access to all the USB devices is re-enabled

DONT FORGET TO COMMENT AND AND  +1 THIS ON GOOGLE 

Saturday, 26 November 2011

How to Forward Local Drives to Remote Machines Using Remote Desktop

sshot-11
Have you ever had a file on a flash drive that you needed to use on a machine that is situated in another building or even halfway across the world? You can do that by plugging it into your local machine and then forwarding the drive through your remote session to that machine. Here’s how to do it.
Press the Windows Key and R to bring up a run box, and type mstsc to launch the Remote Desktop Connection Dialog, or you can just search for Remote Desktop in the Start Menu.
Click on the arrow next to options to see some of the more advanced options.
Once the interface has extended, switch to the Local Resources tab.
Now click on the more button, to see a more extensive list of things that you can forward 
to the remote machine.
Once you have clicked  and expanded the drives, you will see a list of all the devices in your PC, you can forward anything from your CD/DVD drive to a USB drive that you have connected. Check the box next to any of the drive that you want to forward.
Now you can connect to the remote machine as you normally would.
Now if you open explorer on the remote machine you will see you drive, it will appear as if it has been mapped.

Snake Game On You Tube


Step 1: Go to YouTube
Step 2: Select any video
Step 3: Pause the video at 0:00
Step 4: Go full screen
Step 5: Press the LEFT and UP arrow key together twice
Step 6: Enjoy your game of SNAKE :D

DONT FORGET TO COMMENT AND AND  +1 THIS ON GOOGLE 

Friday, 11 November 2011

How to Fix the “AppleSyncNotifier.exe Entry Point Not Found” Error


The full text of the error says “The procedure entry point xmlTextReaderConstName could not be located in the dynamic link library libxml2.dll.”  Obviously this is not the type of article that will apply to most people, but I personally encountered this error on a short person’s computer, and figured I’d write it up just in case somebody else came across it.

The Problem

This error is happening because every time your computer starts, it’s launching various Apple-related background utilities including AppleSyncNotifier.exe. This utility is attempting to load some information from a database and can’t find the right version of the DLL file, because Apple’s installers are lousy. All we need to do is put the file into the right place, and it’ll be fixed.

Fixing the Error

To fix the problem, we’ll need to move two files from one directory to the other one. So open up the first folder:
C:\Program Files\Common Files\Apple\Apple Application Support
Note that if you’re using 64-bit Windows, you’ll need to look in the C:\Program Files (x86) folder.
Once you’re inside that folder, find these two files and copy them:
  • libxml2.dll
  • SQLite3.dll
You can just use Ctrl+C or the menu to copy the files.
Now switch to this folder:
C:\Program Files\Common Files\Apple\Mobile Device Support
Paste the files into there (you’ll have to accept a UAC prompt), and you should be good to go.


DONT FORGET TO COMMENT AND AND  +1 THIS ON GOOGLE 

Create and mount VHD files without any 3rd party application in Windows7

Microsoft’s Virtual PC creates its virtual machine hard drives in VHD files, and Windows 7 can now mount these directly so you can access them in the host system. Click Start, type diskmgmt.msc and press Enter, then click Action > Attach VHD and choose the file you’d like to mount. It will then appear as a virtual drive in Explorer and can be accessed, copied or written just like any other drive.
Click Action > Create VHD and you can now create a new virtual drive of your own (right-click it, select Initialise Disk, and after it’s set up right-click the unallocated space and select New Simple Volume to set this up). Again, you’ll be left with a virtual drive that behaves just like any other, where you can drag and drop files, install programs, test partitioning software or do whatever you like. But it’s actually just this VHD file on your real hard drive which you can easily back up or share with others. Right-click the disk (that’s the left-hand label that says “Disk 2” or whatever) and select Detach VHD to remove it.The command line DISKPART utility has also been upgraded with tools to detach a VHD file, and an EXPAND command to increase a virtual disk’s maximum size. Don’t play around with this unless you know what you’re doing, though - it’s all too easy to trash your system.


DONT FORGET TO COMMENT AND AND  +1 THIS ON GOOGLE 

Get Free .in And Hosting From Google


Google in partnership with HostGator and ICICI Band revealed a new service called India Get Online where you can setup website for your Business or personal use for free. With this amazing offer you will get free .in domain + webhosting for 1 year for free by HostGator.
Now everyone will try to get domains free of cost and will also try to spam with fake websites and other things so Google has taken a security step to maintain no spamming activity, as you will register a new .in domain name you have to provide them with a valid PAN card number and every individual is provided with a single PAN Card Number so he can only register one domain @ a time.
So anytime you feel you wanna change the hosting you can do that by changing your Host from HostGator to anyone. You website will also be integrated with Google Apps and you can take benefit of every Google Product


DONT FORGET TO COMMENT AND AND  +1 THIS ON GOOGLE 

Make Your Computer Welcome You

make ur computer welcome u
Click on Start. Navigate to All Programs, Accessories and Notepad.
Copy and paste the exact code given below.
Dim speaks, speech
speaks=”Welcome to your PC, Username”
Set speech=CreateObject(“sapi.spvoice”)
speech.Speak speaks
3. Replace Username with your own name.
4. Click on File Menu, Save As, select All Types in Save as Type option, and save the file as Welcome.vbs or “*.vbs”.
5. Copy the saved file.
6. Navigate to C:\Documents and Settings\All Users\Start Menu\Programs\Startup (in Windows XP) or to C:\Users\ User-Name\AppData\Roaming\Microsoft\Windows\Start Menu\Programs\Startup (in Windows 7 and Windows Vista) if C: is your System drive.
7. Paste the file.

Now when the next time you start your computer, Windows will welcome you in its own computerized voice.

Note: For best results, it is recommended to change sound scheme to No Sounds.
You can change the sound scheme to No Sounds by following the steps given below:-
Go to Control Panel.
Then click on Switch to Classic View.
Then Click on Sounds and Audio Devices.
Then Click on the Sounds Tab.
Select No Sounds from the Sound Scheme option.
If you wish to save your Previous Sound Scheme, you can save it by clicking Yes in the popup menu.
Click on OK.


DONT FORGET TO COMMENT AND AND  +1 THIS ON GOOGLE 

How to Create Links which Automatically Expires

How to Create Links which Automatically Expires

Expiringlinks.co is a link generating service which creates links which automatically expires @ your given time. They have many options you can select how will your link expire.

Now the process for link creation is really simply simply visit their website 

So now you simply have to paste the link which you want to be expired @ a given time interval
So in this way you can create awesome expiring links which automatically expires on what condition you choose.

DONT FORGET TO COMMENT AND AND  +1 THIS ON GOOGLE 

Convert A FAT Partition To NTFS

To convert a FAT partition to NTFS, perform the following steps. 

1) Open ‘Command Prompt’. 

2) At the command prompt, type the following- 

CONVERT [driveletter]: /FS:NTFS.

‘Convert.exe’ will attempt to convert the partition to NTFS.

NOTE :- Although the chance of corruption or data loss during the conversion from FAT to NTFS is minimal, it is best to perform a full backup of the data on the drive that it is to be converted prior to executing the convert command.

Folder Lock With Password Without Any Software

Folder Lock With Password Without Any Software-
Paste the code given below in notepad and ‘Save’ it as batch file (with extension ‘.bat’).
Any name will do. 
Then you see a batch file. Double click on this batch file to create a folder locker. 
New folder named ‘Locker’ would be formed at the same location. 
Now bring all the files you want to hide in the ‘Locker’ folder. Double click on the batch file to lock the folder namely ‘Locker’.
If you want to unlock your files,double click the batch file again and you would be prompted for password.
Enter the password and enjoy access to the folder.

if EXIST “Control Panel.{21EC2020-3AEA-1069-A2DD-08002B30309D}” goto UNLOCK
if NOT EXIST Locker goto MDLOCKER
:CONFIRM
echo Are you sure u want to Lock the folder(Y/N)
set/p “cho=>”
if %cho%==Y goto LOCK
if %cho%==y goto LOCK
if %cho%==n goto END
if %cho%==N goto END
echo Invalid choice.
goto CONFIRM
:LOCK
ren Locker “Control Panel.{21EC2020-3AEA-1069-A2DD-08002B30309D}”
attrib +h +s “Control Panel.{21EC2020-3AEA-1069-A2DD-08002B30309D}”
echo Folder locked
goto End
:UNLOCK
echo Enter password to Unlock folder
set/p “pass=>”
if NOT %pass%==type your password here goto FAIL
attrib -h -s “Control Panel.{21EC2020-3AEA-1069-A2DD-08002B30309D}”
ren “Control Panel.{21EC2020-3AEA-1069-A2DD-08002B30309D}” Locker
echo Folder Unlocked successfully
goto End
:FAIL
echo Invalid password
goto end
:MDLOCKER
md Locker
echo Locker created successfully
goto End
:End

Copy the above lines exactly.

Convert any files to PDF,Word etc… (using Google)

Convert any files to PDF,Word etc… (using Google)

One of the best way of sending a documents with write protect is through PDF. Because PDF files cannot be changed or edited , so most of the people choose PDF. To make the PDF files you need applications , but Google offers it for free for converting any documents to PDF. All you need to have is Gmail Account.

Just Follow the steps :

Step1 : Google to http://docs.google.com/ .

Step 2: Login using your Google Account.

Step 3: Upload the file that you want to be converted into PDF.

Then Drag and Drop the files which you want to convert.
Step 4: Go to file -> Download file as ->PDF

These are the file types that can be converted to Google Docs:

For spreadsheets: .xls, .xlsx, .ods, .csv, .tsv, .txt, .tsb

For documents: .doc, .docx, .html, plain text (.txt), .rtf

For presentations: .ppt, .pps (.pptx and .ppsx is not supported)

For drawings: .wmf

For OCR: .jpg, .gif, .png, .pdf


DONT FORGET TO COMMENT AND AND  +1 THIS ON GOOGLE 

Popular Posts